What are your thoughts and feelings about How to Install a Bathtub?

Setting up a bath tub isn't exactly brain surgery, yet it does call for solid plumbing, woodworking, and in some cases, tiling abilities. Replacing an old tub with a brand-new one is also a reasonably tough task. If the old tub is easily easily accessible, the task can move speedily; if you have to open up a wall surface to get rid of the old tub as well as position the brand-new bath tub, the task is much harder. In either instance, the task is within a home handyman's skills, although you will require an assistant to move out the old tub as well as embeded in the new one. Ensure you have qualified yourself for the job and are comfortable trying it. As opposed to working with a contractor to take over a halfway-completed project, it is better to consider employing one before you begin. Chances are you might require a specialist plumber to make tube links.
This write-up will certainly aid you mount a brand-new bath tub in your washroom if you have actually currently gotten a brand-new bathtub as well as don't need to change the arrangement of your previous supply of water pipes.
Your tools and also product list must make up the following:
- New Tub
- Hammer
- Pipe Wrenches
- Prybar
- Safety Glasses
- Level
- Pliers
- Adjustable Wrench
- Putty Blade
- Screwdriver
- Cold Knife
- Measuring tape
- Pipe Caps
Preparing for the Installment
First of all, the supporting framework supplied with the bath needs to be fitted (if called for) according to the supplier's directions. Next, fit the taps or mixer to the bath tub. When suitable the tap block, it is essential to make sure that if the faucet includes a plastic washer, it is fitted between the bath and the faucets. On a plastic bathroom, it is also sensible to fit a sustaining plate under the taps unit to stop pressure on the bath tub.
Fit the versatile tap connectors to the bottom of the two faucets making use of 2 nuts as well as olives (often supplied with the tub). Fit the plug-hole electrical outlet by smearing mastic filler round the sink outlet hole, and afterwards pass the outlet through the hole in the bathroom. Utilize the nut provided by the maker to fit the plug-hole. Analyze the plug-hole electrical outlet for an inlet on the side for the overflow pipe.
Next, fit the end of the adaptable overflow pipeline to the overflow outlet. After that, screw the pipeline to the overflow face which must be fitted inside the bath. Make sure you make use of every one of the supplied washers.
Attach the trap to the bottom of the waste outlet on the bath tub by winding the string of the waste outlet with silicone mastic or PTFE tape, and also screw on the catch to the outlet. Attach all-time low of the overflow tube in a comparable manner.The bath should now prepare to be suited its final placement.
Removing Old Taps
If you need to change old taps with brand-new ones as a part of your setup, then the first thing you need to do is detach the water supply. After doing so, activate the taps to drain any type of water remaining in the system. The procedure of getting rid of the existing taps can be fairly problematic as a result of the limited access that is typically the situation.
Use a basin wrench (crowsfoot spanner) or a faucet tool to undo the nut that attaches the supply pipes to the faucets. Have a towel ready for the continuing to be water that will come from the pipelines. Once the supply pipes have actually been removed, utilize the very same tool to loosen the nut that holds the faucets onto the bath/basin. You will certainly need to stop the single faucets from transforming throughout this procedure. As soon as the taps have actually been gotten rid of, the holes in the bath/basin will have to be cleansed of any kind of old sealing compound.
Before going on to fit the new taps, contrast the pipeline links on the old taps to the new faucets. If the old faucets are longer than the brand-new taps, after that a shank adapter is required for the new taps to fit.
Installing the Tub
Making use of both wooden boards under its feet, place the tub in the needed placement. The wood boards are useful in uniformly spreading out the weight of the bath tub over the location of the boards instead of focusing all the weight onto 4 small points.
The next goal is to make sure that the bath tub is leveled all round. This can be attained by checking the spirit level and changing the feet on the tub up until the level reviews degree.
To install taps, fit the bottom of the furthest flexible tap port to the suitable supply pipe by making a compression join; then do the exact same for the various other tap.
Switch on the water supply and check all joints and also brand-new pipework for leakages and also tighten them if needed. Fill up the tub and likewise inspect the overflow electrical outlet and also the regular electrical outlet for leaks.
Lastly, repair the bath paneling as described in the manufacturer's user's manual. Tiling and also securing around the bath tub must wait up until the tub has been used a minimum of once as this will settle it right into its final position.
Fitting New Touches
If the tails of the brand-new faucets are plastic, then you will need a plastic adapter to stop damages to the thread. One end of the connector fits on the plastic tail of the tap and also the various other end supplies a connection to the existent supply pipelines.
If you require to fit a monobloc, then you will require lowering couplers, which attaches the 10mm pipeline of the monobloc to the typical 15mm supply pipe.
Next, position the faucet in the placing opening in the bath/basin making sure that the washing machines are in place between the faucet and also the sink. Safeguard the faucet in place with the producer given backnut. As soon as the faucet is safely in place, the supply pipes can be attached to the tails of the faucets. The taps can either be attached by utilizing corrugated copper piping or with typical tap ports. The former type should be attached to the faucet ends first, tightening up just by hand. The supply pipes can later be attached to the various other end. Tighten both ends with a spanner after both ends have been attached.
Tiling Around the Tub
In the area where the bathroom fulfills the floor tile, it is required to secure the accompanies a silicone rubber caulking. This is important as the fitting can relocate enough to fracture a stiff seal, causing the water to pass through the wall in between the bathroom and the tiling, causing problems with dampness and also possible leaks to the ceiling listed below.
You can choose from a selection of coloured sealers to blend in your components and installations. They are offered in tubes and cartridges, and can sealing voids as much as a width of 3mm (1/8 inch). If you have a bigger gap to fill up, you can load it with twists of soaked paper or soft rope. Bear in mind to always load the bathtub with water prior to sealing, to permit the motion experienced when the bathtub is in usage. The sealant can fracture rather early if you do not think about this movement prior to securing.
Additionally, ceramic coving or quadrant floor tiles can be used to edge the bathroom or shower tray. Plastic strips of coving, which are easy to use and cut to size, are likewise conveniently available on the marketplace. It is suggested to fit the tiles utilizing waterproof or waterproof sticky and also cement.
Bathtub Installation
How Important Is A Bathtub To Your Home?
High-quality baths, showers, and other bathroom updates are necessary when considering a smart investment in your home. It’s a room that you go to every day and one that is constantly being used by guests.The bathroom is one of the top trafficked rooms in a home and also one of the most valuable in terms of home resale.
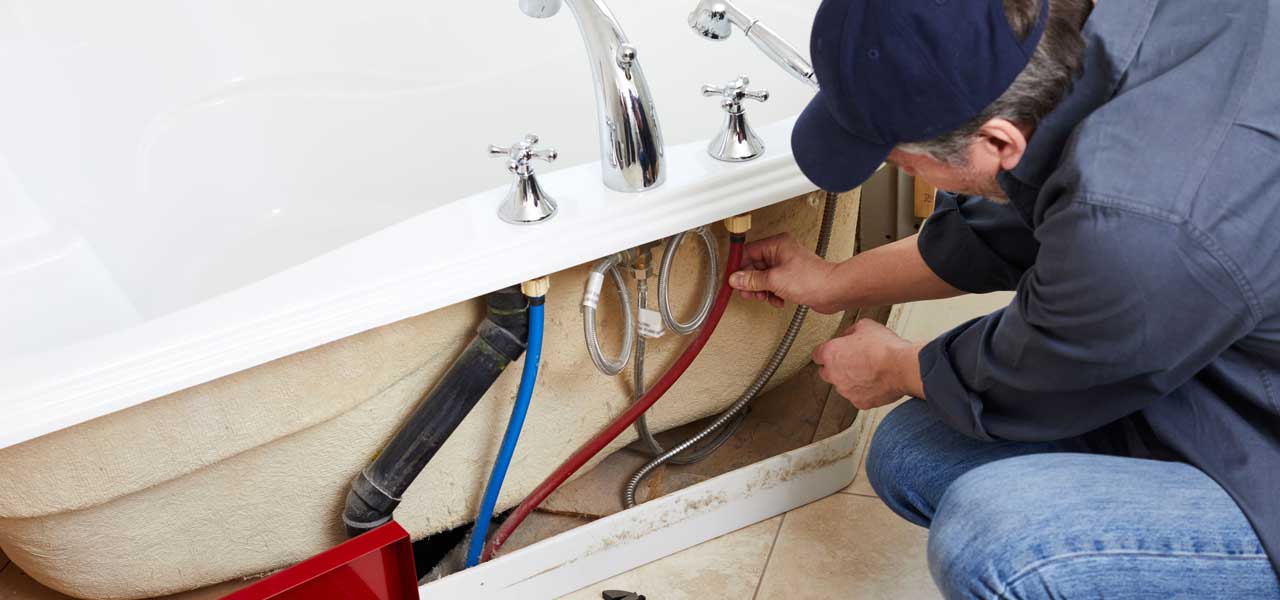
Install Piping Before Tub
You will be using your existing drain and waste vent system, but pipes required include the hot and cold water supply lines and a pipe leading to a shower head. A mixing valve and shower head are also needed. Air chambers may be required.
Position the Tub
Lower the tub into place so that the continuous flange fits against the wall studs and rests on 1’x4' or 2’x4' supports. Anchor the tub to the enclosure with nails or screws inserted through the flanges into the studs.
NOTE: Remember, bathtubs and shower stalls may require support framing. A bathtub filled with water is extremely heavy, so check building codes and framing support before installing the tub.
Assemble Drain Connections
Assemble the bathtub drain connections by connecting the tub overflow with the tub drain above the trap, not beyond it. The trap will have a compression fitting that screws over the arm of the overflow assembly.
Place a Pipe For the Shower Head
First, locate a brass female threaded winged fitting and attach it to a framing support via a screw or a nail. Then run a pipe up the wall for the shower head. Sweat or solder the other side of the brass fitting to the top of the pipe.
Attaching Hot and Cold Water Lines
Attach your water lines for both hot and cold by sweating these directly into the hot and cold ports of the mixing valve. The mixing valve will be how water enters the tub’s system, not by the pipes themselves.
Install the Spout
Extend a piece of 1/2 inch pipe, or whichever length is specified in the manufacturer’s instructions, for the tub spout. Sweat on a male threaded fitting at the end of the pipe or use a brass nipple of the proper length and a 1/2 inch cap.
NOTE: At this point you should have your rough-in plumbing work inspected before proceeding further.
Check For Leaks
Restore the water pressure and check the drain connection and the supply pipes for any sign of leaking.
estore the Bathroom Wall
Replace the wall with moisture-resistant drywall as a base for your wall covering. Seal the joints between the wall and your new tub with silicone caulk as protection against water seepage.
https://www.berkeys.com/2016/12/02/bathtub-installation-dallas/
I found that write up on Installing A Bathtub when doing a lookup on the web. Enjoyed our blog posting? Please share it. Let other people discover it. Kudos for your time. Come back soon.
Free Estimate
Comments on “Just How to Set up a Bath Tub”